Friday, September 28, 2012

BSU

BSU

     These are a pair of BSU (Boise State) earrings.  The thread is embroidery floss and the pattern was a simple pattern I put together.


Thursday, September 27, 2012

Pendent

Pendent

     I bought a pair of earrings with the intent of tatting around them.  Diane's Dare from Lace-Lovin' Librarian, finally got me going. The pendent was made with Lizbeth size 20 in Vineyard Harvest.  The pattern was just something I inspirational tatted.  I sold it immediately, the next day.  So there isn't a pattern...or a good picture of it.


Wednesday, September 26, 2012

More Wire-Wrapping


More Wire-Wrapping

     This was a simple wire-wrapped pattern.  The teeth are sharks.  Sharks don't have any bones, so what is left is their teeth.  The teeth were wrapped with sterling silver wire and hang on an 18" black cord.  The teeth are approximately 1" long and are for sale on West Pine Creations.


Tuesday, September 25, 2012

Coral Neckalaces

Coral Neckalaces

    Someone had gave these little pieces of coral/glass.  She said they were coral, but I think she meant they were coral colored.  To me, they look like glass.  She asked me to make her a pair of earrings and gave me the rest.  I wire-wrapped around the coral with copper wire.  I'm not into wire-wrapping and this is as far as it goes....nothing fancy.  They are all on sale on West Pine Creations.


 Tatted chain:  size 10 crochet thread with a copper filament.


 The pendent is 20 x 28 mm and the chain is 18".
The copper has been treated with lacquer to prevent tarnish.


 The pendent is 20 x 28 mm and the adjustabe chain is 16" to 18".
The copper has been treated with lacquer to prevent tarnish.


 The pendent is 20 x 28 mm and the chain is 18".
The copper has been treated with lacquer to prevent tarnish.


 The pendent is 20 x 28 mm and the chain is 18".
The copper has been treated with lacquer to prevent tarnish.


The flower is 2.5" and the chain is 17".
The copper has been treated with lacquer to prevent tarnish.
     

Monday, September 24, 2012

Pinterest

Pinterest

     Most of us are familiar with "Pinterest", by now.  If you are not, this is an excellent way to display your tatting patterns and pictures.  If you are like me, I remember a favorite patten, but couldn't remember where (in my "Favorites") it was located.  Pinterest gives me the visual of the pattern.
    
      My Pinterest page is layed out in subject matter.  For example:  Tatting Patterns: Crosses, Tatting Pattens: Jewelry.  
    
      Not all pictures can be posted ("Pinned") on Pinterest.  Copy writed pictures and some others, won't allow the picture to be Pinned.  You can also go to someones page and "Repin" a picture to your page.  The website link is usually at the bottom of the Pin, so you can go back to the website.
  
     My Pinterest page is here.  So give her a try and  sign up.


Tatsmithing


Friday, September 21, 2012

Doll Earrings

Doll Earrings

      The pattern was "Sunbonnet Sue Motif", found in The Big Book Of Tatting, by Darlene Polachic.  The dolls were done in Lizbeth, size 80, in Wildflower Garden.  The dolls are 1 3/4" long and1 1/2" wide.


Thursday, September 20, 2012

Diane's Dare

Diane's Dare

     Diane (Lace-Lovin' Librarian) dared us to tat around these, little doodads (which she supplied, mine was about 5/8").  You could use someone else's pattern or design your own pattern. 


     My pattern, started out to be a motif for another shirt.  I had three rows designed and started tatting.  By the time I finished the second row, I liked it so much, I wanted to leave it for a pair of earrings.  The finished earrings are 1 3/4", plus the ear wire (not shown, the ear wire goes on the top picot.  I use changeable ear wires so I can use one pair of ear wires for all of my tatted earrings.).  The earrings were tatted with Lizbeth, size 20, in Vineyard Harvest.


     Now, to give back.  Here is my pattern.  Enjoy!!!!


20 of 25 Motif Challenge

Wednesday, September 19, 2012

Tatsmithed Pendent

Tatsmithed Pendent

     This is a pendent, from one of my books called, "Tatsmithing:  The Art of Silversmithing with String".   A copy of it can be purchased from my Face Book Page:  West Pine Creations.  To the right of my blog, are links to information on my three books.  
     This pendent was made with two strands of Coats and Clark sewing thread.  The stone was an ocular agate, shown as "bulls-eyes" or swirls.  The swirls made a sort of a heart in the middle of this agate.


Monday, September 17, 2012

Paua Shell and Mother of Pearl Bracelet

Paua Shell and Mother of Pearl Bracelet

     This is one of the bracelets I silversmithed.  I bought the shells and made the settings.  The shells are purple paua and mother-of-pearl.  The bracelet is 7 1/2" long and for sale on my face book page:  West Pine Creations.


The picture doesn't do it justice.

Friday, September 14, 2012

Shirts

Shirts

     I had gotten these shirts, last fall, on clearance with the intentions of tatting them up.


"Sunbonnet Sue Motif", found in The Big Book Of Tatting, by Darlene Polachic.  The doll was done in pearl cotton #8.


 Anne B's famous dragon in Lizbeth, size 20 Fruit Frizz. The color didn't show up in the picture.  I added stars with silver glitter fabric paint (Silver Glitter Puffy Paint by Tulip).


This was part of a motif for a trolly mat.  I made a mistake on the third round and decided to use fabric paint to finish it out.  this looks great in person!!  The thread was Lizbeth, size 80, Wildflower Garden.


Thursday, September 13, 2012

Turquoise Thank You

Turquoise Thank You

    This is a thank you present to a very special lady.  She is my "Church Mom".  We can never have enough mothers looking after us.  Of course, they can never replace our natural mom's.  I am truly, blessed with an awesome mother...parents.  My "Church Mom" had given me some silver smithing supplies and opal triplets, from Spencer Opal mine, in eastern Idaho.  My "Church Mom" wears this beautiful, turquoise top but needs a necklace to enhance the shirt.
     This is her necklace.  The bauble is the "Universal Bauble"  design from my first book:  "Tattasaurusing:  Baubles and Motifs" The book is for sale on my Face Book page.  You can get to the link my clicking on the highlighted words or to right of this blog.  The bauble was done in size 80 thread and the adjustable, chain was done in size 10 thread.


18 of 25 Motif Challenge

The glass bauble, is just a plain bauble you can get in the craft section.

Wednesday, September 12, 2012

The Last of the Dragon Herd

The Last of the Dragon Herd

  This dragon was done in Lizbeth, size 20, Mocha and Mountain Breeze. 


17 of 25 Motif Challenge
  

Tuesday, September 11, 2012

Monday, September 10, 2012

Condensor

Condensor


Set Up:
-         14, 8, & 6 mm tubing
-         # 1 tip
-         Matches/mats/towel/glass cutter/screen/corks
-         Blow tube
                       
Condenser (14, 8, & 6 mm tubing):
-         Use a # 1 tip.
-         Stabilizer (6 mm tubing) (can use the same one from the bubbler tube):
o       Make a maria and taper out the end, next to the maria
o       Blow out a small pressure relief hole near the maria
-         Using 8 mm tubing, make 2 side arms w/maria and a taper near the Maria.
-         Using 8 mm tubing, cut a long piece of tubing. 
o       This will be the inside part of the condenser.
-         Using 8 mm tubing, cut 2 long pieces.
o       Bevel one of the ends, of one of the pieces.
-         Make a long test tube from 14 mm tubing.
-         Attach the side arm near the end of the test tube.
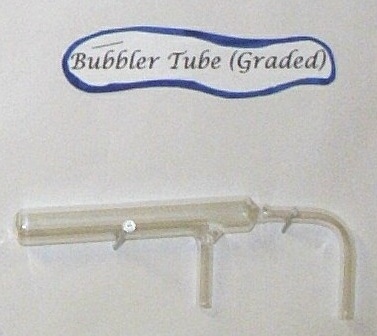
-         Make a bubbler tube.
-         Attach the second side arm approximately 2-3 cm from the end of the center tube.
-         Cork all the side arms.
-         DO THE NEXT STEPS ALL AT ONCE!!  DO NOT STOP!!
o       Collapse the outer walls until they touch the inner tube.
o       Continue heating and pull off the end, causing a ring seal.
o       DON’T STOP!!
o       Attach the blow tube to the end and remove the corks from the side arms.
o       Heat the center of the ring seal and blow out.
o       DON’T STOP!!
o       Attach the other end of the tube. 
-         Cut the extra tubing off of the side arms and fire polish.


Congrats...you finally have your A and successfully finished the course.  

Friday, September 7, 2012

Mountain Meadow Dragon

Mountain Meadow Dragon

 This dragon was done in Lizbeth, size 20, Mountain Breeze. 


Thursday, September 6, 2012

Wednesday, September 5, 2012

Winery Dragon

Winery Dragon

This dragon was done in Lizbeth, size 20, Vineyard Harvest. 


Tuesday, September 4, 2012

Spice Dragon

Spice Dragon

 This dragon was done in Lizbeth, size 20, Autumn Spice and Leaf Green Med. 


Monday, September 3, 2012

Bubbler Tube

Bubbler Tube
 
Set Up:
-         14, 8, & 6 mm tubing
-         # 1 tip
-         Matches/mats/towel/glass cutter/screen/corks
-         Blow tube

Bubbler Tube (14, 8, & 6 mm tubing):
-         Use a # 1 tip.
-         Stabilizer (6 mm tubing):
o       Make a maria and taper out the end, next to the maria
o       Blow out a small pressure relief hole near the maria
-         Using 8 mm tubing, make a side arm w/maria and a tapered near the Maria.
-         Using 8 mm tubing cut a long piece of tubing and fire polish one end.  This will be the inside part of the bubbler tube.
-         Using 8 mm tubing, cut another long piece.
-         Make a long test tube from 14 mm tubing.
-         Attach the side arm near the end of the test tube.
-         DO THE NEXT STEPS ALL AT ONCE!!  DO NOT STOP!!
o       Insert the fire polished tubing in the test tube w/the unpolished end near the end of the test tube.
o       Insert the stabilizer w/the tapered edge touching the fire polished tubing.
o       Attach blow tube.
o       Heat the end of the test tube until the glass fuses.  This is your ring seal.  DON’T STOP!!
o       Blow out a hole in the center of the ring seal.  DON’T STOP!!
o       Make an end-to-end seal with the last piece of 8 mm tubing.  DON’T STOP!!
o       Make a right angle bend on the 8 mm tubing.
-         Remove the blow tube and stabilizer.
-         Attach the blow tube to one of the 8 mm ends.
-         Make a test tube on the open end at least one cm from the center tube.
Remove excess tubing from the tube with the bend and fire polish.


 You now have your B.