Friday, June 29, 2012

White and Gold Cross

White and Gold Cross

     This is another special order from  Lene Bjorn's "Tatted Bookmarks" book.  This pattern is called the "Maria".  It was tatted in  size 10 thread in white, with a iridescent filament, and gold, with a gold filament.  This cross is 6" long.


Thursday, June 28, 2012

Turquoise and Purple Dragon

Turquoise and Purple Dragon

     Today's and yesterdays post were a special order.  The costumer wanted to sew a large dragon down the back of her shirt.   Anne B's dragon was done in size 3 crochet thread.  The wingspan is 8.5" and 9" long.


Wednesday, June 27, 2012

Turquoise and Green Dragon

Turquoise and Green Dragon

     Another Anne B's dragon done in size 10 crochet thread.  The wingspan is 5.5" and 5.5" long.


Tuesday, June 26, 2012

My Shuttle

My Shuttle

     Finally a shuttle for me.  I've been wanting a tatting shuttle pendent that matches my tatting shuttle earrings.  I had gotten a couple of charms and made them into earrings from Classy 925 They were very reasonable and the ear wires are inexpensive. 
     My sterling silver shuttle is 39 X 25 mm, not including the soldered jump ring.  The jump ring is solder so that it doesn't interfere with tatting. Yes, I can tat with it also.  I made a hook to hook it to, so it's also a necklace.  The stones are opals.


Monday, June 25, 2012

Bulb in the Center of Tubing

Bulb in the Center of Tubing


Set Up:
-         Blow tube
-         File/glass cutter
-         14 mm tubing
-         Mats, metal plate
-         Matches
-         Towel
-         #3 tip
-         Cork to fit 14 mm tubing

Bulb in Center of Tube (14 mm tubing): 
      Remember:  Hot glass looks the same as cold glass!!  Don't burn the top of your bench, put your hot glass on the ceramic mats. 
     DO ALL YOUR WORK OUTSIDE THE FLAME!!!!  Use the flame to soften your glass.  Keep your glass rotating in the flame, for even heating.
   Cut a piece of tubing about 6" long and cork one side. 

   Make 2 marias, side-by-side, leaving a small gap in between.
   Heat both marias together until they collapse together and the glass has the same thickness.
   Remove molten glass from the flame and blow a bulb.  You may need to reheat and blow again, until the bulb is smooth and without wrinkles.
o       The bulb must NOT exceed 2x’s the diameter of the tubing.
o       The bulb MUST be the same thickness as the tubing.


Friday, June 22, 2012

Pearly White Cross

Pearly White Cross

     This is one of my favorite crosses from  Lene Bjorn's "Tatted Bookmarks" book.  I love this book!!!!!  The cross is the "Maria" and is made with size 10 crochet thread.  The while thread has an iridescent filament (didn't show up in the picture) and the gold thread has a gold filament. The cross measures 12 X 16 mm.


Thursday, June 21, 2012

It's All Rings

It's All Rings

     This is another pattern from  Nina Libin's, "One Shuttle, Lots of Beads".  I had to add a few more ds to accommodate the 4 mm pearl.  I made a pair of earrings, using the same technique. The thread is DMC Embroidery Thread.


Wednesday, June 20, 2012

Adding On...

Adding On...

     A couple of weeks ago (8 June), I made a neclace ("It's All Rings") that was a little plain.  I spruced it up a little by adding a pendent to it.  
     The pendent is another pattern of Nina's.  It's called "Green Iris Pendent" and can be found on Georgia's site The pendent is made with Lizbeth, size 20, Autumn Spice.


Tuesday, June 19, 2012

Matching Pearl Earrings

Matching Pearl Earrings

     These earrings were another pattern from Nina Libin's, "One Shuttle, Lots of Beads".    This was another "rings only" pattern that matched the bracelet, from yesterdays post.

     The thread was DMC's Metallic Embroidery thread. 


Monday, June 18, 2012

Bud Vases

Bud Vases

     This is a reminder:  the glassblowing portion of my blog, is a refresher for my students who has had my glassblowing class or someone who has glassblown before.  If you have not glassblown, I suggest you take a few beginner lessons.
 
Set Up:
-         14 mm  Pyrex tubing
-         Colors (Pyrex)
-         # 3 tip
-         Matches/mats/towel/glass cutter
-         Blow tube
-         Flaring tool or end of a file

See last Mondays lesson (11 June 2012) on the blow tube and test tube making.


  Remember:  Hot glass looks the same as cold glass!!  Don't burn the top of your bench, put your hot glass on the ceramic mats. 
     DO ALL YOUR WORK OUTSIDE THE FLAME!!!!  Use the flame to soften your glass.  Keep your glass rotating in the flame, for even heating.

 
Bud Vases (14 mm tubing & encased rod):
-         Make a test tube, including the flare
-         Dab the flare w/small amounts of color, and reheat it to fuse the glass.
o       To make a point/pen at the end of your colored glass, heat the tip of the colored glass, remove it from the flame, touch it with a cold piece of glass and pull.  This is drawing out your glass.
-         Using a pointed tool (file end/tweezers – don’t apply these to the heat!!), make a frilly edge.
o       Heat the edge, remove from heat, push one edge down and out.
-         Attach handle using colored rod.
-         Anneal handle joint, using a cooler flame (turn down the oxygen) and sooting (blanketing) up the join.  This causes the glass to cool slower.
-         Once cool, remove soot with a tissue and hang on edge of something.


Sunday, June 17, 2012

Happy Father's Day

Happy Father's Day

     No tatting to show today.  Just saying "Happy Father's Day" to all the Father's out there. 


Friday, June 15, 2012

Pearl Bracelet

Pearl Bracelet

     This bracelet was another pattern from Nina Libin's, "One Shuttle, Lots of Beads".    This was another "rings only" pattern. 
     The thread was DMC's Metallic Embroidery thread. 


Thursday, June 14, 2012

My Tea Set and Box

My Tea Set and Box

     The tea pot and one of the cup, saucer, and spoon was given to me from my parents.  The other cup set was given to me from my best friend, Jenniffer Dickens (friends since pre-school).  The fabulous tea box was made by Dad from a black walnut tree.  The walnut wood came from my grandpa's farm. 


 Oped the top lid:  Lid for the teapot lid, two spoons and two tea cups.


 Open the side:  Teapot, two saucers and a secret drawer.


The secret drawer (plays music when it's open):  strainer, pot holder, silver spoons for loose leaf tea, and glass spoons for dipping out honey.


Cup, saucer and spoon.


 I still need to design/make two doilies for the saucer.  I have a design drawn out, just need to figure out the number of ds.


Wednesday, June 13, 2012

My First Doily Design

My First Doily Design

     This is my finished Doily Design.  It is 184 mm across (just over 7") and made with size 30 crochet threads.  I wanted a doily to go with my beautiful Rose Teapot, given to me by my parents.


13 out of 25, "25 Motif Challenge"


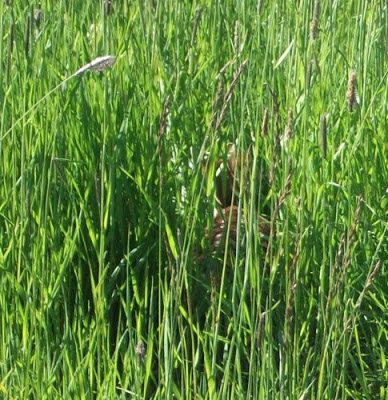
     We just got back from fishing at Winchester, Id.  While we were there we seen new born white tail deer.  It was soooo adorable and SMALL!!!  It was the size of a chihuahua.  In southern Idaho, we have mule deer and are a lot larger than white tail.


Can you see the baby?


Tuesday, June 12, 2012

My First Attempt at Designing a Doily

My First Attempt at Designing a Doily

     The doily is 13 cm across and made with three colors of Star, size 80 tatting thread.  The last two rows were a little tight, so I need to do a little tweaking.  Stay tuned until tomorrow, for the refined product.   


Monday, June 11, 2012

Test Tubes

Test Tubes


Set Up:
-         14 mm Pyrex tubing
-         # 3 tip
-         Matches/mats/towel/glass cutter
-         Blow tube
        -         Flaring tool or end of a file

Blowing Tube:  The end of a corn cob pipe to use as a mouth piece.  Small diameter surgical tubing to fit over the mouth piece and a swivel at the other end.  Another piece of surgical tubing, small piece of fire polished 6" glass tubing and an adapter for fit snugly over 14 mm tubing.  Ck out ABR Imagery for a set up.


Lighting the torch:
    Use the "POOP" method (propane on, oxygen on, oxygen off, propane off).
     Have your flame (match or striker) ready and hold it near the torch tip.  Turn on the red knob (propane), and obtain about a 6" orange flame.  Turn on the green knob (oxygen), and obtain about a 3/4" blue flame.
     Turning off the oxygen first (green), then the propane (red).  DO NOT OVER-TIGHTEN THE KNOBS!!!!!  YOU'LL RUIN THE NEEDLE VALVES AND YOUR TORCH WON'T PROPERLY TURN OFF!!!!!!!!!
      Do you work at the tip of the darker blue flame.


Test tubes w/flare (14 mm tubing):
  Remember:  Hot glass looks the same as cold glass!!  Don't burn the top of your bench, put your hot glass on the ceramic mats. 
     DO ALL YOUR WORK OUTSIDE THE FLAME!!!!  Use the flame to soften your glass.  Keep your glass rotating in the flame, for even heating.

 
-         Heat middle of tubing, remove from heat, and pull two ends apart.
-         Remove as much of the glass to prevent a large lens.
-         Heat the end and collapses the very end of the bulge
-         Remove the tube from the flame and blow out  to form a dome.  Remember:  DO NOT PUT YOUR TONGUE ON THE HOLE OF YOUR MOUTH PIECE!!  This prevents the air from circulating thought your piece and the hot, expanding gases will blow a hole in your piece.  This also goes for spit in your blow tube.  Chewing gum doesn't work either, can get stuck in your mouth piece...OH BOY...how embarrassing!!
-         The glass should have a uniform thickness.  You may need to collapse and blow out the end a few times to get out any "wrinkles". 
o       Avoid lenses, causes stress points
-         Once cooled, lightly heat the edge of the tube, remove from heat, and form a flare w/the-flaring tool or the end of a file handle.

 Remember:  Turn off the green knob (oxygen) then turn off the red knob (propane).  DO NOT OVER-TIGHTEN THE KNOBS!!!!!


Friday, June 8, 2012

It's All Rings

It's All Rings

     This is a necklace from Nina Libin's, "One Shuttle, Lots of Beads".  This is a great pattern to travel with.  The necklace is done in rings only, with her famous "pulled loop join".  
     The necklace is 16" long and made with Lizbeth, size 20, Autumn Spice.


Thursday, June 7, 2012

Another Estate Find

Another Estate Find

    I found this lovely mirror to display all of my "Tatsmithing" for my fall shows.  


Wednesday, June 6, 2012

12 Out of 25: 25 Motif Challenge

12 Out of 25:  25 Motif Challenge

     So what is the "25 Motif Challenge"?  You have to tat 25 things (anything) within one year.  Check out Sharon's site to see everyone latest tatting projects.     
     I'm using my Tatsmithing for my challenge.  This is my latest pendent, made with one strand of gold and one strand of copper ("Rose Gold") sewing thread.  The stone is a piece of Willow Jasper.  There looks like a flower in the lower right corner of the stone.  


Tuesday, June 5, 2012

Tatsmithing: "Tall Agate"

Tatsmithing: "Tall Agate"

     This stone is not an agate.  It is a piece of petrified palm wood.  The pendent measures 27 mm x 38 mm.  The thread is two strands of Sulky metallic thread.  I'm not pleases with the Sulky thread, it tends to fray.  The Coats metallic thread works perfectly.


  One of the patterns from my new "Tatsmithing" book.

Monday, June 4, 2012

Connector

Connector

Supply List:
Torch set up

Burt's Bees burn cream/q-tip

Fire extinguisher

Size 3 tip for you torch 

Triangle Stand for Hot Glass

Ceramic mat

8 mm Pyrex tubing (colorless)

Towel (breaking glass)

File/glass cutter


Lighting the torch:

    Use the "POOP" method (propane on, oxygen on, oxygen off, propane off).
     Have your flame (match or striker) ready and hold it near the torch tip.  Turn on the red knob (propane), and obtain about a 6" orange flame.  Turn on the green knob (oxygen), and obtain about a 3/4" blue flame.
     Turning off the oxygen first (green), then the propane (red).  DO NOT OVER-TIGHTEN THE KNOBS!!!!!  YOU'LL RUIN THE NEEDLE VALVES AND YOUR TORCH WON'T PROPERLY TURN OFF!!!!!!!!!
      Do you work at the tip of the darker blue flame.


Connector:

     Remember:  Hot glass looks the same as cold glass!!  Don't burn the top of your bench, put your hot glass on the ceramic mats. 
     DO ALL YOUR WORK OUTSIDE THE FLAME!!!!  Use the flame to soften your glass.  Keep your glass rotating in the flame, for even heating.

 
     Connectors are used to hold the latex or tygon tubing in place.  If they weren't at the end of the glass tube, your flexible tubing would slide off. 

     Practice making perfect miria's by pushing the glass together, but not so much, that the ends touch.  The touching of the glass causes lenses.  This is a stress point and the glass can crack.


     Once the perfect miria's are obtained, make two miria's 5" apart.  Heat near the end of the tubing and pull part of it off, but not all the way off.  Do the same to the other end.  Once the piece cools, score and break off the the end.  Fire polish the ends.


Remember:  Turn off the green knob (oxygen) then turn off the red knob (propane).  DO NOT OVER-TIGHTEN THE KNOBS!!!!!


Friday, June 1, 2012

Dragon

Dragon

     Another dragon, fused on a little denim purse.  The purse was made by one of our local artist, Margret Thomason.  She makes these lovely purses out of recycled jeans.  This purse is just the right size for a tatting booklet and my tatting.  The dragon is 6 mm x 8 mm and tatted with two strands of Sulky, 40 wt, rayon thread.  I tried one strand of thread and it kept breaking while closing the second ring.  I had no problem with two strands.


     Notice anything funny about this dragon, or should I say a bit skinny......I forgot the middle and was too lazy to go back.  I still like the way he turned out.